Description
Want to come to my pickle party? Homemade garlic dill pickles are the guest of honor and they are briny, crunchy and fabulous!
Ingredients
Units
Scale
- 6 cups water
- 2 tablespoons pickling salt
- 1 tablespoon brown sugar
- 1/2 cup white vinegar
- 1 bay leaf
- 3 garlic cloves
- 3 pickling cucumbers (see note#1)
- 2 small shallots, sliced into rounds
- 9 large dill sprigs
NOTE: It helps if you have a mandolin for this, but you can use a knife too.
NOTE: You will need 3-4 glass jars for this. I use wide mouth jars.
*** THE PREP/COOK TIME IS 15 minutes. You have to wait THREE WEEKS to eat them. ***
Would you like to save this?
You'll also be the first to hear about new recipes in my weekly-ish newsletter! :)
Instructions
- Put six cups of water in a pot and add: pickling salt, brown sugar, white vinegar, bay leaf. Turn heat on high and bring to a boil. Once it’s boiling – turn the heat off.
- While liquid is heating slice the garlic cloves thin and separate into three piles.
- Next, using a mandolin, slice the cucumbers at ¼” thickness. You can make them thicker if you prefer. If you don’t have a mandolin just use a knife and slice in uniform pieces.
- Slice the shallots into rounds and separate into three piles.
- Separate the dill into three piles and cut the longs stems from bottom.
- I usually line up my three portions of ingredients for each jar of pickles. (see video)
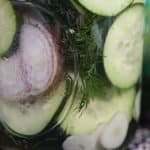
- Start by filling the bottom third of your glass jars (you must use glass for this) with the sliced cucumbers, then add the sliced garlic (spread it out), sliced shallot, then fold the dill sprigs and stuff into the jar. Add more cucumber slices on top of that – as much as you can fit. Do this for all jars.
- Add the hot pickling liquid to each jar leaving a small space at the top of the jar.
- Put the lids on and screw the tops tightly.
- There may be extra cucumbers depending on the size you bought and extra liquid too. If you have extra and another glass jar just make more.
- Put jars in the refrigerator for three weeks for best results. I usually taste one at the end of week 1, week 2 and then week 3. It’s helpful to understand the flavor differences at each stage.
Notes
- They don’t always have pickling cucumbers at the supermarket and they didn’t have any when I made this recipe. Using regular pickles works too, though they are slightly better with pickling cucumbers.
- If you have pickling spice you can add some to the pickling liquid. I’ve never been able to find that at the grocery store. Also, you can add other ingredients to experiment. If you like spicy pickles, add a little red chili to one jar to see how it comes out!