

If you love crispy-skinned chicken thighs, you are really going to love this one. To me, the chicken thigh has far better flavor than white meat chicken. I mean, there's really no comparison. And I know that chicken thighs have a lot of fat and that's a concern. But if you take the time to trim the fat from chicken thighs - problem solved! Then you can make this incredible crispy chicken thighs with parmesan caper sauce. It's seriously delicious.
Elephant in the Room: Chicken Thighs Have a Lot of Fat
Look, if you're going to make the effort to cook at home and make delicious food, there's gotta be some give and take. I get it - white meat chicken is leaner and healthier. It also has no flavor. We have to take the time to make it taste like something. And yes, I love making white meat more interesting. If you have time, obviously I'd love for you to check out some of my stuffed chicken recipes, like my stuffed chicken pepperoni pizza bake, jalapeno popper stuffed chicken wrapped in bacon or cheesy fajita stuffed chicken.
But for now, we need to talk about how fatty chicken thighs are. You simply can't eat all that fat... or you shouldn't, anyway. I made a great tutorial about how to trim the fat from chicken thighs that I highly recommend you watch. Get yourself a decent pair of kitchen shears and start using them to trim the fat when you are cooking chicken thighs.
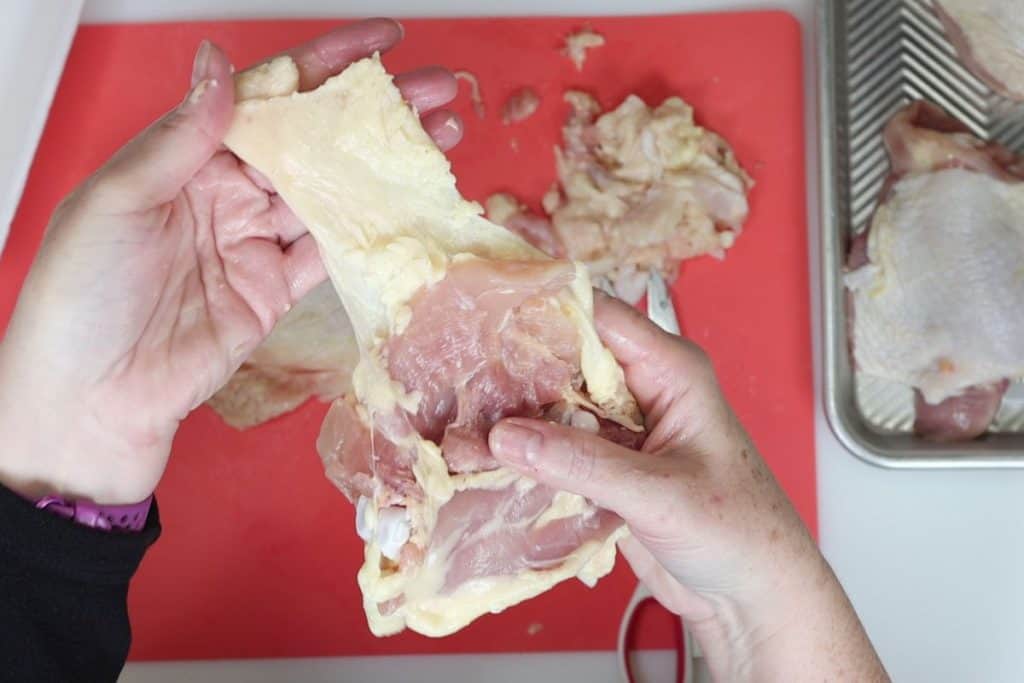
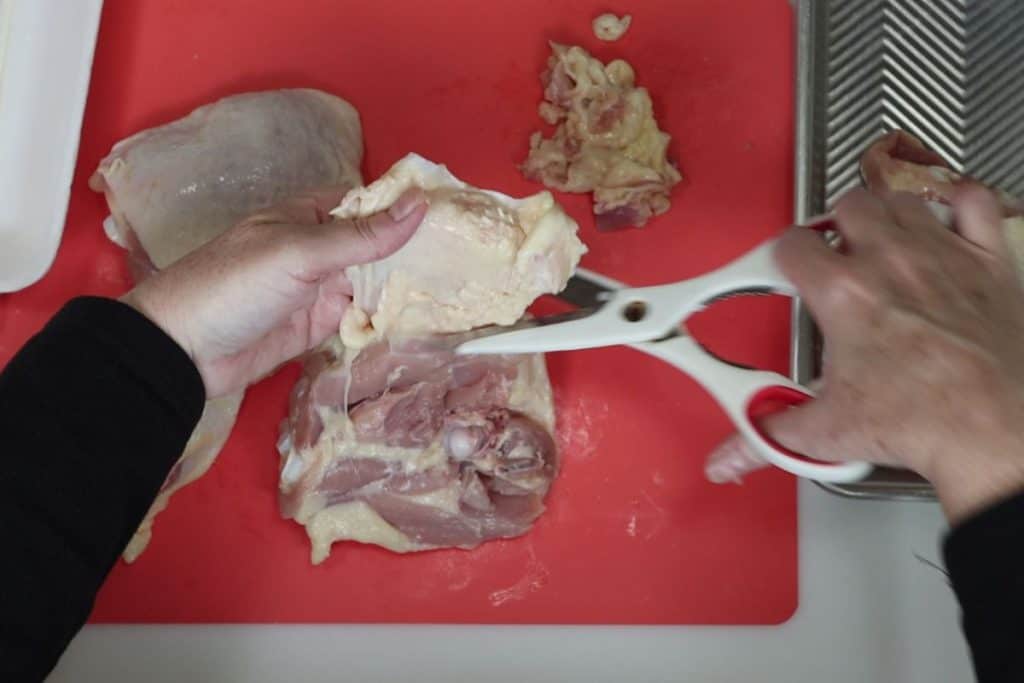

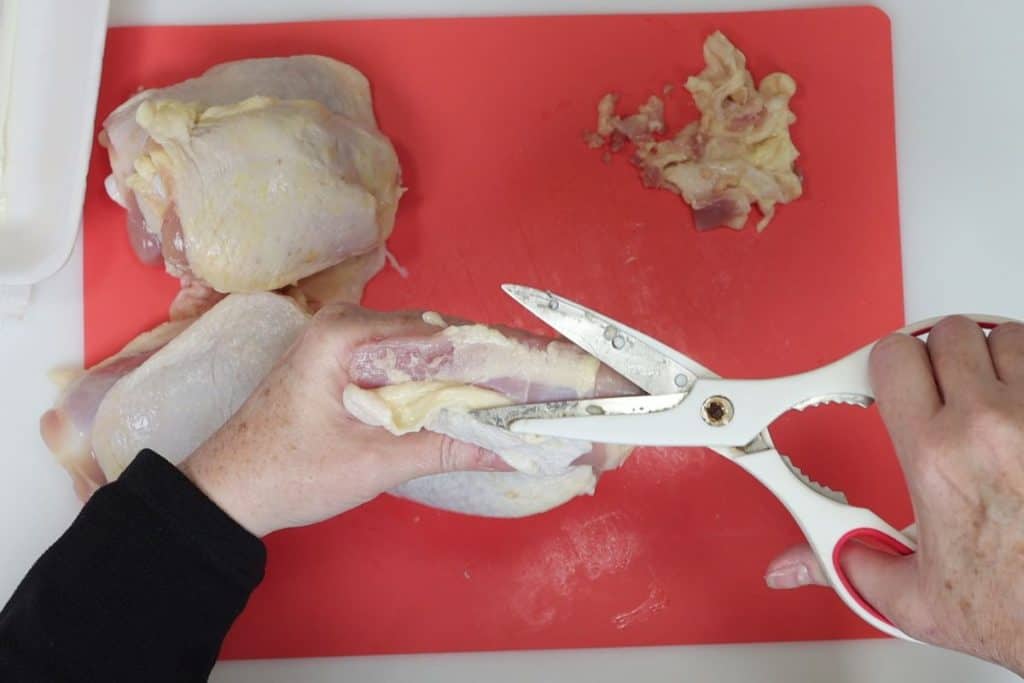
To summarize trimming the fat: Start with the obvious flaps of fat around the edges. Then look underneath. Anywhere you see fat, do a quick nosedive with your scissors and starting trimming it off. Chicken thigh fat can run deep and you've got to dig in with your scissors and get it out! Watch my how to trim the fat from chicken thighs for all the details. It's really very helpful!

Crispy Chicken Thighs: The Secret Everyone Already Knows
In my everyday life, I would say I don't usually eat the skin when I prepare chicken... except when I do. Hey, I'm only human and I do crave a little crispy chicken skin from time to time. This recipe definitely does the trick.

So here's the trick: you've got to sear the chicken thighs skin-side down to crisp up the chicken before it goes in the oven to finish cooking. Makes all the difference in the world. And yes, you can cook your chicken thighs at 400-425 degrees and you'll get a slight crisp. But cooking them skin-side down before they go in the oven is a game changer in terms of crispiness.

Making the Choice to Cook at Home
If I think back to the pre-pandemic days, there was a lot more dining out happening for sure. Then we had to look within for a while and people who didn't cook too much started cooking more. And half-way decent home chefs became culinary wizards in the kitchen. At least that what it feels like when I think about it.
Would you like to save this?
You'll also be the first to hear about new recipes in my weekly-ish newsletter! 🙂
I realize we all have busy lives and cooking can feel so very overwhelming. But I promise you that if you plan ahead, decide on a few things you want to make, and get smarter with your grocery shopping you will save money each month.
Everyone should know how to make a delicious home-cooked meal. Whether you're just starting out or regularly prepare food for your loved ones, I've got a lot of great recipes to choose from right here. 🙂 All my recipes have step-by-step videos to walk you through the whole process.
Cooking with Leftovers in Mind Solves Your Daily Lunch Dilemma
If you are already cooking dinner, make a little extra so you can take it for lunch. My God, the amount of money spent on eating out lunch is crazy. I used to work in an office where people bought lunch every day. That's $12-15 at minimum per day. How can anyone afford to do that??
I created this website to help people learn to cook in their own homes and be able to follow along with instructional videos. When I decide what I'm eating for the week, I think of recipes that have some ingredients in common so I don't spend too much. Making extra helps too so I can easily (and quickly) reheat food and have a nice meal the next day too.
Easy Steps to Making Crispy Chicken Thighs with Parmesan Caper Sauce


Chicken Thighs Still on Your Brain? No Problem!
- Cardamom Chicken Thighs with Coconut Raisin Rice
- Crispy Chicken Thighs with Honey Butter Garlic Sauce
- Chicken Thighs, Sauerkraut and Sausage
- Harissa Chicken Thighs with Yogurt
- Rosemary Balsamic Grilled Chicken Thighs
- Pickle Juice and Buttermilk-Brined Fried Chicken Sandwich

Crispy Chicken Thighs with Parmesan Caper Sauce
- Prep Time: 30 minutes
- Cook Time: 45 minutes
- Total Time: 1 hour 15 minutes
- Yield: 4-6 portions 1x
Description
Calling all chicken thigh lovers! I’ve got an awesome recipe for crispy chicken thighs with parmesan caper sauce. You’re gonna love it.
Ingredients
- 6 bone-in, skin-on chicken thighs
- 5 tablespoons salted butter, cubed
- 1 tablespoon onion, finely diced
- 1 teaspoon fresh garlic, finely diced
- 1 cup shredded parmesan cheese
- ¼ cup white wine vinegar (or reg. white vinegar)
- 1 teaspoon Dijon mustard
- ½ cup heavy cream
- 1 tablespoon capers, plus splash of caper brine
- 1-2 tablespoons chopped fresh dill for garnish
- Salt and pepper to season chicken
Would you like to save this?
You'll also be the first to hear about new recipes in my weekly-ish newsletter! 🙂
Instructions
- Take a few minutes to trim the fat from the chicken thighs. Get a pair of good kitchen shears and start with obvious flaps of fat around the edges. We want to keep the top skin intact because we’re going to crisp that up when cooking. But you want to get as much of the other fat as possible trimmed off. For all the info on trimming the fat – you should watch my tutorial.
- Season both sides of the chicken thighs with salt and pepper. I would say a ½ to ¾ teaspoon of salt total and about ¼ teaspoon of pepper total should do the trick. After seasoning the chicken, I like to let it set for a few minutes. This would be a good time to organize the rest of your ingredients and get ready to prep.
- Heat a large oven-safe skillet on medium heat and wait until it’s hot to add the chicken thighs skin-side down. Cook on medium-to-high heat or 8-10 minutes until the skin has crisped a little and it slightly golden brown. Turn the pieces over and bake in a preheated oven at 400 degrees for about 40-45 minutes until internal temperature of chicken is 165 degrees. NOTE: if you don’t have an oven-safe pan it’s okay. Just cook chicken skin-side down in a regular pan, then transfer to a baking dish and bake in oven.
- While the chicken is cooking, you can make the sauce. Keep in mind the sauce only takes about 12-13 minutes to cook once your ingredients are prepped. So plan your time as to when you start making the sauce.
- Cube the butter first as this should go back into the refrigerator until you’re ready to use it for the sauce. Use the outside of the butter wrapper as a guide to cut at the 5 tablespoon mark. Cut the butter in half lengthwise. Then cut the two halves in half lengthwise again. This will give you four sticks which you can then cut into cubes. Put in a small bowl and put back in refrigerator for now.
- Finely dice the onion and put in ramekin (small dish).
- Finely dice the garlic and add to onion dish. One small clove should equal about 1 teaspoon finely diced.
- Shred fresh parmesan cheese. Yes, you can buy the already-shredded stuff, but whenever possible, I do like to shred my parmesan cheese right before using. Use the leftover cheese block for spaghetti night!
- Get your other sauce ingredients ready: white wine vinegar (you can use regular white vinegar if that’s what you have on hand), capers, Dijon mustard, heavy cream.
- Add white wine vinegar to a small pot with the garlic and onion. Cook on low-to-medium heat. This will heat quickly. Stir ingredients a few times while the heat reduces the liquid by about ¾. When the liquid is barely coating the bottom of the pot it’s done. This should only take a few minutes to happen. My video shows this well so you have an idea of what it should look like.
- Get your cubed butter from the refrigerator. Add 3-4 butter cubes at a time to the reduced vinegar, garlic and onions. Whisk the butter until melted, then add 3-4 more cubes of butter and whisk those until melted. Keep doing this until all the butter is melted. Do not add all the butter at once or it won’t emulsify. You should be whisking continually throughout the process. Once all the butter is melted this should be a slightly thickened mixture.
- Slowly whisk the heavy cream into the butter, vinegar, onion, garlic and whisk until incorporated.
- Whisk in the Dijon mustard.
- This part is optional: If you want to strain out the garlic and onion for a smooth sauce now is the time to do this. Again, my video shows this well. Pour the sauce through your finest strainer over a bowl and press gently on the garlic and onions to squeeze all the sauce out. This is home cooking and a lumpy sauce doesn’t matter, but if you want to impress guests, strain out the onion and garlic.
- Transfer the sauce back to the small pot on low-to-medium heat. Add the capers, plus a little splash of the caper brine and whisk together.
- Add the parmesan cheese and press gently into sauce. Mostly you want to let the cheese sit and melt. Then give it a stir, and when it’s fully melted give it a taste and see if you need to make any adjustments. I loved it the way it was and felt it didn’t need any salt (don’t forget there was salt in the butter, capers and Dijon). If you want more salt or more Dijon flavor that is up to you. I felt the sauce had the perfect thickness, but if you want it a little thicker add a bit more cheese. The sauce yield is a little more than one cup total. J
- Once your chicken is cooked, let it rest a few minutes on the counter.
- While it’s resting you can chop the fresh dill for garnish. You can skip this part of course, but adding that fresh pop of herbs to this dish really pushes it over the edge in my opinion. The dill brings another level of flavor here and makes for a great presentation too.
- For serving, I put the chicken on a serving plate. DO NOT spoon the sauce over the chicken until right before you are serving or your crispy chicken thighs will not be crispy.
- I spooned a little sauce over each chicken thigh and a little more to fill the gaps on the plate. There was still sauce leftover which you can serve on the side. The sauce is crazy delicious and you will likely use it all.
- Garnish the platter with the chopped dill and long dill sprigs too. I also scattered more capers over the top – but that’s up to you. Serve immediately. Good sides for this: salad and veggies.


Leave a Comment