

As you may have guessed by now: I love making omelets. One of my goals is to also share how easy it is to make a restaurant-quality omelet right in your own kitchen. A flip omelet is a lot easier to make than it looks. If you are not confident in your omelet skills, just watch my video and it will take you through all the steps of how to make a western omelet.
Western Omelets are Easy to Make if You Know These Three Secrets
Do you want to know how to make a western omelet? I mean, a cheesy, hammy, fluffy, incredibly delicious western omelet? If you've read my two other omelet posts, you know the three components to making a fantastic omelet are:
- Butter
- Olive Oil
- Steam
The olive oil and butter give the omelet a nice flavor and keep it from sticking to the bottom of the pan. Once you've put all your ingredients in the pan, including the beaten egg, you've got to tilt the pan around and push in the edges. Let the raw egg fill the gaps. You'll still have some raw egg on the top and that's okay. Turn the heat down to the lowest possible setting and put the lid on. Keep it on for about three minutes. The steam will do wonders for fluffing up the omelet and keeping the bottom of the pan slick so you can flip it.


If you want a nice, yellow omelet with little to no browning on the outside - this is the recipe for you. However, if you do like your omelet browned on the outside all you really have to do is leave it in the pan a little longer on a higher heat.
Would you like to save this?
You'll also be the first to hear about new recipes in my weekly-ish newsletter! 🙂
Hamming it up: You can't make a western omelet without it
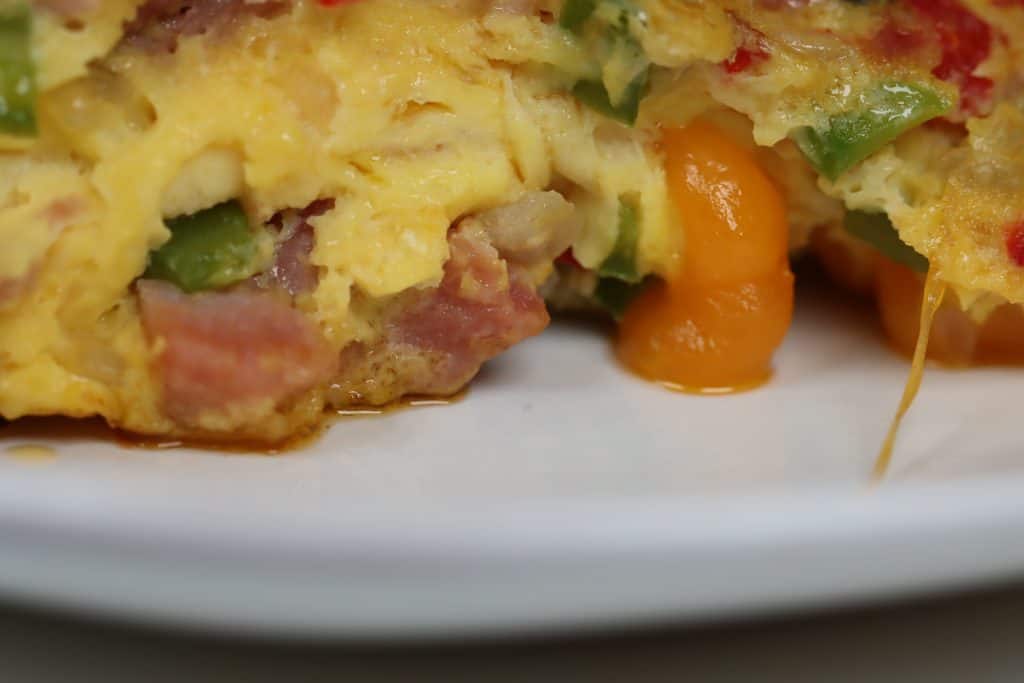
Yes, I created a heading called hamming it up because it is, technically, what you need to do with your omelet, thus the moniker: Western Omelet. Must. Have. Ham. I used leftover Easter ham for this recipe, and it worked out great. If you don't have any, use the already packaged, cubed stuff at the grocery store. Also delicious. I love many varieties of omelets for sure, but my all-time favorite omelet is this Western Omelet. It's almost never quite right when I order it at a restaurant, so I've taken matters into my own hands. If you feel the same way, do try to make this awesome omelet. If you are a diehard Western Omelet lover like me, you will fall in love with it. I know that's dramatic, but it's sooooo true.
When Making a Western Omelet, Flying Ham Chunks Are a Gift
Here's the thing about flying ham chunks. If you don't cube your ham into small enough pieces they won't stay adhered to the egg when you flip the omelet. This is when ham chunks start flying. This can be unexpected and cause you to lose your flip mojo, since the ham will most likely start flying mid-flip. On the other hand, if you're really hungry the flying ham can give you a little pre-omelet nibble. In my video I have one, lone flying ham chunk and I loved every nibble.
Looking for More Scrumptious Breakfasty/Brunchy Ideas? I Gotcha Covered:
- Simple Cheese Omelet w/Home Fries
- Mega Omelet (IF YOU DARE)
- Skillet Frittata with Spinach, Leeks & Feta
- Roasted Tomato, Asparagus, Gruyere Quiche
- Cheddar Stuffed French Toast w/Warm Peach Compote
- Four Awesome Avocado Toast Ideas

How to Make a Western Omelet
- Prep Time: 5 minutes
- Cook Time: 7 minutes
- Total Time: 12 minutes
- Yield: 1 omelet 1x
Description
This is my favorite omelet. Ham, cheese, onions and peppers. The perfect Sunday morning omelet.
Ingredients
- 3 eggs
- ½ cup cubed ham
- 1 tablespoon diced onion
- 1 tablespoon diced red pepper
- 1 tablespoon diced green pepper
- ½- ¾ cups shredded cheddar
- 1 tablespoon butter
- 1 tablespoon olive oil
- Pinch of salt
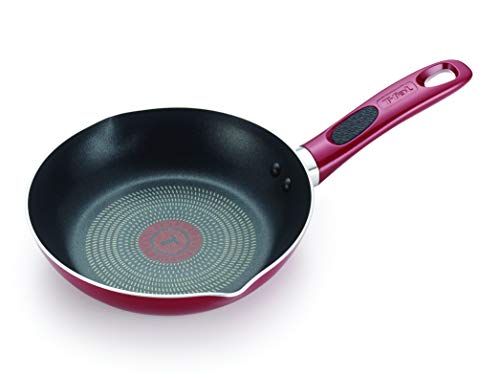
NOTE: For best results, use an 8" Teflon omelet pan with a lid
Would you like to save this?
You'll also be the first to hear about new recipes in my weekly-ish newsletter! 🙂
Instructions
- Dice your onion, red pepper and green pepper.
- Dice your ham (I had some leftover Easter ham I put in a ramekin).
- Beat three eggs with a pinch of salt.
- Shred cheddar cheese (or whatever cheese you have on hand or use sliced cheese).
- Heat butter and olive oil in a pan on low to medium heat.
- Add onions and peppers and cook for 2-3 minutes, while stirring.
- Add cubed ham and cook another minute or two.
- Pour in the egg and work the spatula around the pan. Push the sides of the omelet in and tilt the pan to let the raw egg fill the gaps (see video). This should only take a minute or two.
- Turn the heat down to the lowest possible setting and cover the pan for three minutes. The steam will help cook the egg on top and fluff up your omelet.
- Remove the lid and shake the pan gently – the omelet should be sliding around. If it's not, turn the heat up slightly and within a few seconds the pan will be slick. Time to go for the flip. Move the pan forward and back, forward and back and when it feels right – one slightly stronger thrust forward with a fast pullback and a gentle flick of the wrist is all it should take for your omelet to briefly take flight and flip over. Add the cheese and let the omelet cook a for 30 seconds - 1 minute and then fold it over. Turn heat off and let cheese melt.
- Serve immediately.


Notes
- I used leftover Easter ham, but you can use the already-packaged diced ham at the grocery store. Just as delicious.
- Use whatever cheese you want! I like cheddar so I used that. American and Swiss would work great too.


Brigadier
Superb recipe. The only change I made was using a 9-inch skillet.
Stacey
Thanks so much! Glad the 9-inch pan works for you! 🙂
Lani
Loved this recipe!! I made it for me and my sister the only change I made was not adding the ham because she is vegetarian but other than that we both loved it!
Stacey
Yay for cooking! Thanks for trying this Lani - appreciate your support.