
It's that time of year and the holidays are fast approaching. There are so many things you need to do, plans to make, guests to invite. Or maybe you're doing a pot luck thing with your friends and need an affordable finger food to bring along. Either way, it's very easy to spend a lot of money on food and entertaining this time of year. So I did a little homework for you and came up with this affordable Walmart cheese tray.
Affordable Walmart Cheese Tray is Just $20 (and thirty five cents) 🙂
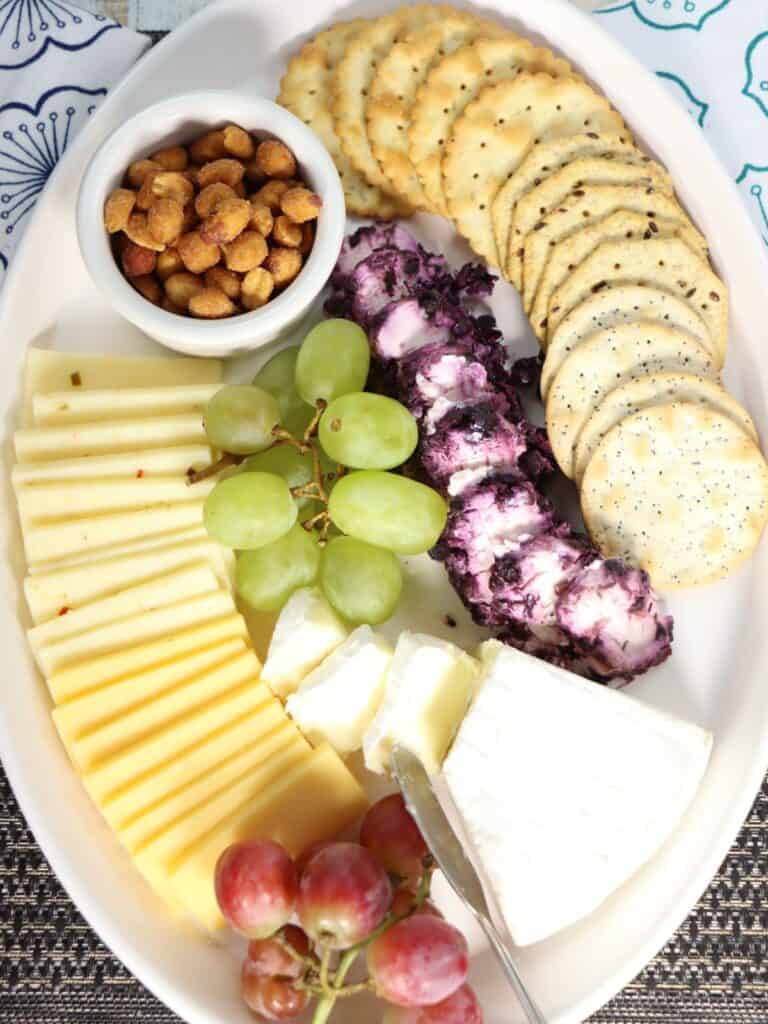
The best part about this cheese tray is the bang you get for your buck. I went to a Walmart Supercenter which has a whole grocery store in addition to the regular store. I was really surprised by how many cheeses they were offering. The $2 cheeses are a must, of course. However, you've got to splurge a little by getting a small triangle of brie and one other fancy-ish cheese to elevate your cheese tray. I went with the blueberry goat cheese which I never had before and it was incredible!
Cost Breakdown of the cheese tray:
- Gouda cheese: $2
- Pepperjack cheese: $2
- Brie cheese: $2.97
- Blueberry goat cheese: $3.98
- Large box of variety crackers: $4.28
- Grapes: $2.68
- Honey roasted peanuts: $2.44
- GRAND TOTAL: $20.35
What makes this a great value (no pun intended) is you can re-fill your cheese tray. Or make two cheese trays with what you have... and you'll still have more left! If you go with hot appetizers, you'll need two or three options and that will jack the costs up way over $20.
Would you like to save this?
You'll also be the first to hear about new recipes in my weekly-ish newsletter! 🙂
Tips for Assembly of Your Walmart Cheese Tray
- Presentation: With cheese trays uniformity is a thing. These types of platters of food seem to have a symmetry to them, right? Don't be afraid to play with it and be a little fussy.
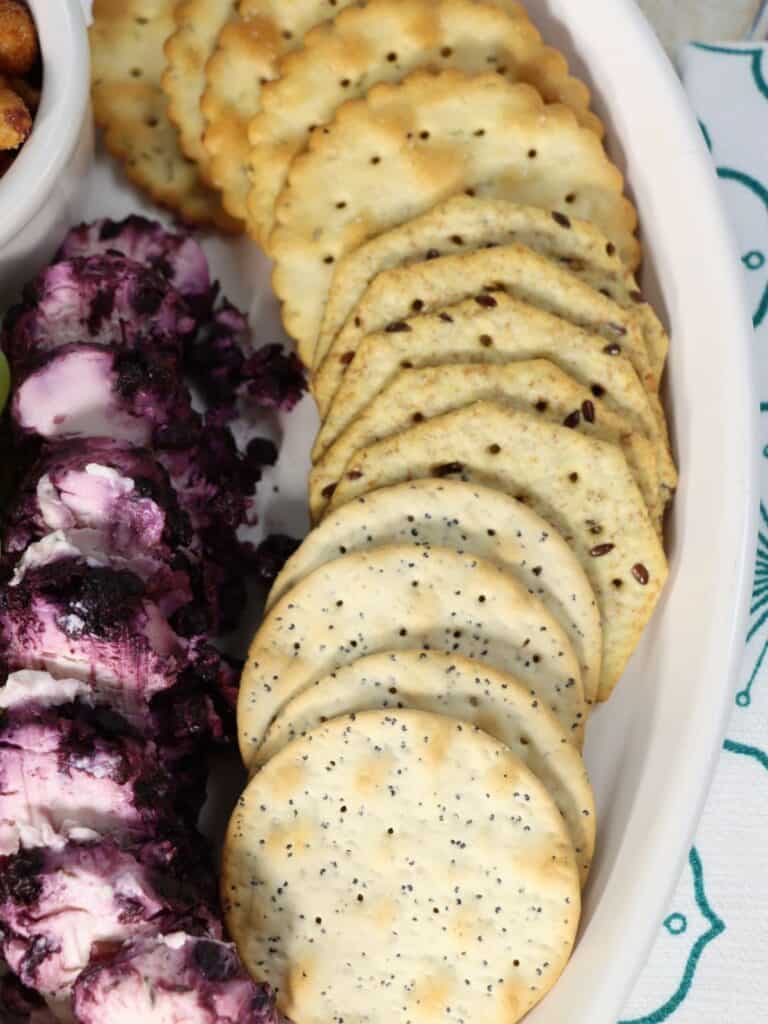
- The crackers: There are six different flavors in the variety pack at Walmart which I go over in the video. They are all different sizes/shapes, so lump similar-shaped crackers together and try to snake them around something so they look neat and symmetrical.
- Blueberry-Lemon-Thyme Goat cheese: You'll want a couple splashes of color with your cheese tray and this cheese works great for that. When I was first imagining the tray I thought of the beauty of that log of goat cheese. Then I realized it actually looked much better sliced.
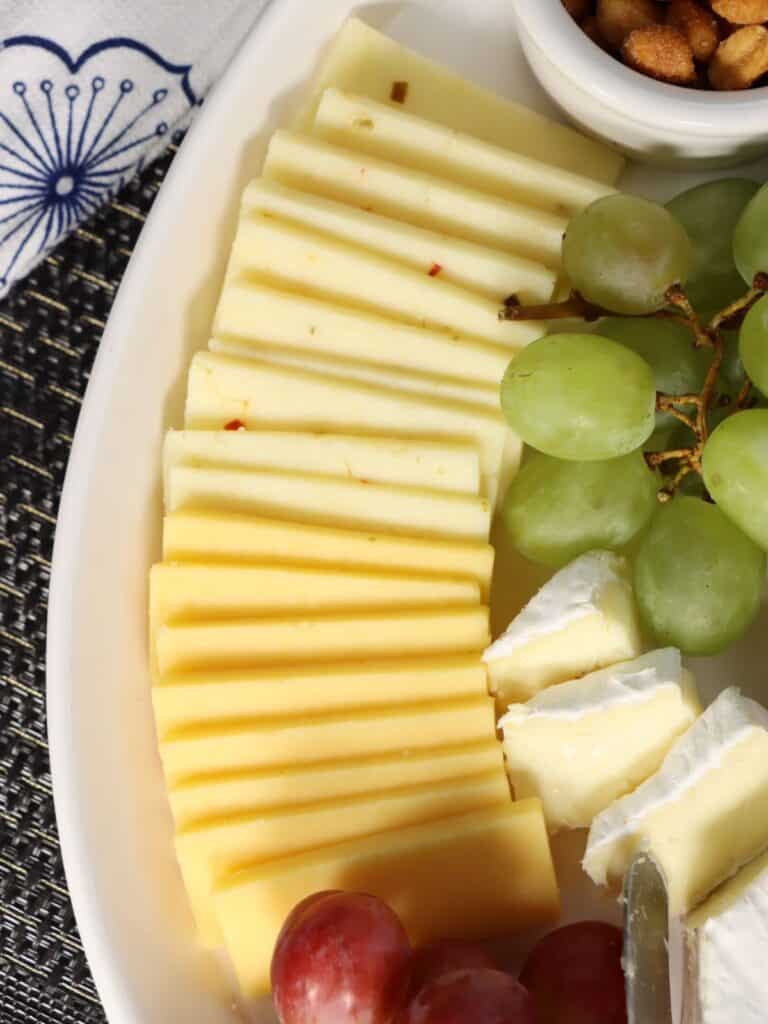
- Grapes: Examine your grapes and pick the best looking grapes for your platter (s).
- Brie: This is a cheese that also looked slightly better with a few slices cut for better presentation. You could also drizzle honey on top of it if you have that on hand.
Optional Add-ons for Your Cheese Tray:
Remember, if you are on a budget, it's time to get crafty. Think of what you might already have on hand that you can add to your cheese tray or serve on a side plate.
- Cream cheese and jelly.
- Olives of any kind (put them in small ramekins).
- Sliced fruit (melon, strawberries, apples).
- Deli meat (leftover from sandwiches??). Cut the meat slices in half, roll it up and stick a toothpick in it.
- Honey (drizzle some on the brie to make it look pretty).
- Hummus (awesome with crackers).
Looking for More Appetizer Ideas Beyond the Cheese Tray?
- Stuffed Mushrooms with Sausage, Panko & Cheddar
- Apple Brie Crostini
- Canned Crab Toasties (no Mayonnaise)
- Brown Sugar Bacon Sticks Brushed w/Maple Syrup
- Nana's Weird Hot Dog Appetizer
- French Onion Soup Crostini
- Phyllo Cups FIVE Ways

Affordable Walmart Cheese Tray
- Prep Time: 15 minutes
- Total Time: 15 minutes
- Yield: 8-10 portions 1x
Description
Looking for budget-friendly finger food for the holidays? Well, I’ve got a fantastic affordable Walmart cheese tray you are going to love.
Ingredients
- 1 Gouda cheese, 8 ounces
- 1 Pepperjack cheese, 8 ounces
- 1 Brie cheese, 4 ounces
- 1 Blueberry/lemon/thyme goat cheese, 4 ounces
- 1 Box entertainment crackers, 13.1 ounces
- 1 Jar honey roasted peanuts, 16 ounces
- 1 bunch mixed grapes (green & purple), 1 lb, total
Would you like to save this?
You'll also be the first to hear about new recipes in my weekly-ish newsletter! 🙂
Instructions
- Note: Presentation will vary depending on the size and shape of your platter. I used an oval platter and this is what I chose for presentation. You can use this as a jumping off point for your own tray.
- Slice the gouda and pepperjack cheeses into thin slices about ¼” in thickness.
- Select an assortment of crackers and place them around the edge or your plate/platter/tray.
- Place the sliced pepperjack on the other side around the edge.
- Place a small ramekin on the platter for the peanuts.
- Slice the blueberry goat cheese and here’s a tip: keep a glass of warm water to dip your knife in after each slice so the goat cheese doesn’t fall apart. Slice the goat cheese on a separate, small cutting board and don’t transfer to the platter until you are ready. Once you put the goat cheese on the platter you can’t move it again. The blueberries get messy and stain the bottom of the tray.
- Start assembling your tray and see where things fit best.
- Start placing the sliced pepperjack cheese around one edge of the tray with the crackers on the other. And figure out where the triangle of brie will go. My video shows the presentation well.
- Use a spatula to place the sliced blueberry goat cheese on the platter (it’s neater that way).
- Slice a few pieces of brie from the triangle.
- Add the sliced gouda next to the sliced pepperjack.
- Pick a small bunch of green and red grapes and place on the platter in between the cheeses.


Leave a Comment