
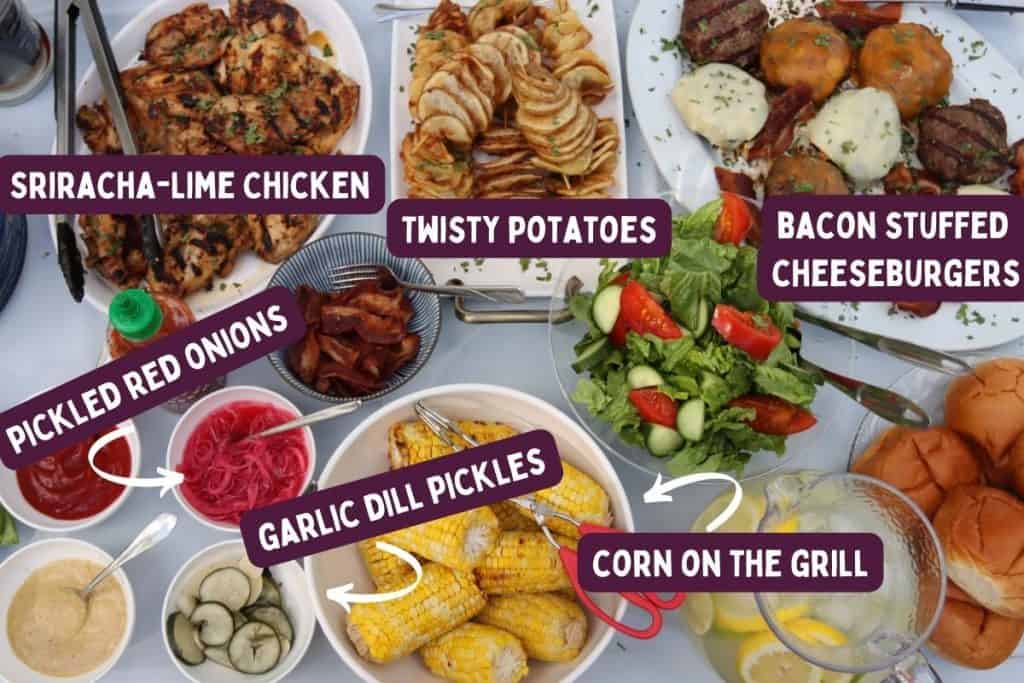
It's officially grill season here in New England and I recently purchased a new grill. Yay! And what better way is there to kick off the summer season than grilling up some amazing food for your next outdoor gathering? My backyard bbq menu features a fantastic sriracha-lime grilled chicken, bacon stuffed cheeseburgers, twisty potatoes and super easy foil-wrapped corn on the grill. It's perfect for about 8-10 people. Let's do this!
Backyard BBQ: Sriracha-Lime Marinade is perfect for grilling chicken
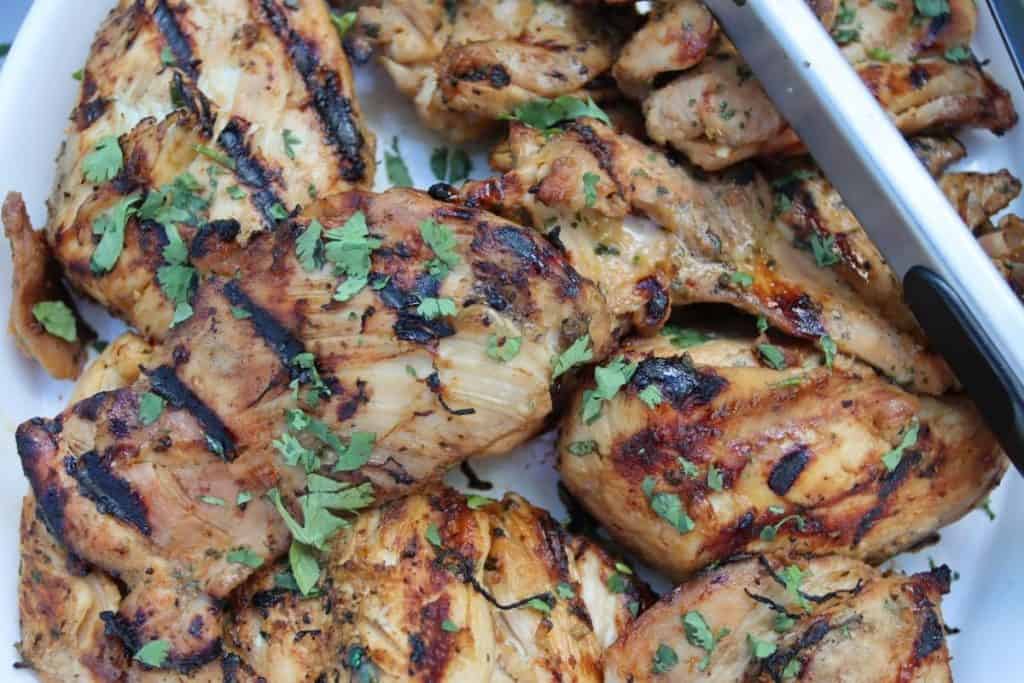
This is seriously one of the best marinades I've ever tried and you're going to love it. It's a real burst of flavor yet doesn't overwhelm. I love chicken for outdoor grilling. I know, a lot of people are all about the burgers, hot dogs and kielbasa. And I've got a great burger to share too so don't get ants in your pants just yet. But I am a sucker for a perfectly grilled piece of marinated chicken. This chicken is great alone and awesome with a salad topped with some of the reserved marinade or My Favorite Balsamic Vinaigrette. Here's the finished product:
Backyard BBQ: Bacon-Stuffed Cheeseburgers, Ohhh Yeahh

This might be the best burger I've ever made. I've tinkered with bacon-stuffed cheeseburgers for years. Should I use a whole strip of cooked bacon and build the patty around it? Should I wrap the bacon strips in cheese, THEN encase it in the ground beef? The best method, in the end, was to cook my strips of bacon and let them cool. Then I chopped the bacon down into bacon bits and added the bits to my ground beef with worcestershire sauce, dijon mustard, salt, pepper and grated onion. This provides an incredible flavor to the ground beef. AND! For those of you who absolutely need to see the strips of bacon, more bacon strips are served on the side to top your burger.
Here's a little secret: You can make the burger patties the day before the cookout! Yes, because of course you want to save time when you have people coming over.
- Cook the bacon, let it cool before chopping and make the burger mix.
- Form your burgers into 5 to 6-ounce patties. I weighed mine on a little scale. They were closer to 6 ounces. Eyeballing it is fine too! Mine were about an inch thick.
- Lay out your patties on a sheet pan or two. I used mini sheet pans to save room in the fridge.
- Cover mini sheet pans in plastic wrap and stack on top of each other in fridge.
- Take out of fridge 15 minutes before grilling.
- One more tip: I normally salt and pepper both sides of my burger before cooking. You do not need to do that here. There's enough salt in the burger mix.
For Twisty Potatoes: the topping ideas are endless
Would you like to save this?
You'll also be the first to hear about new recipes in my weekly-ish newsletter! 🙂
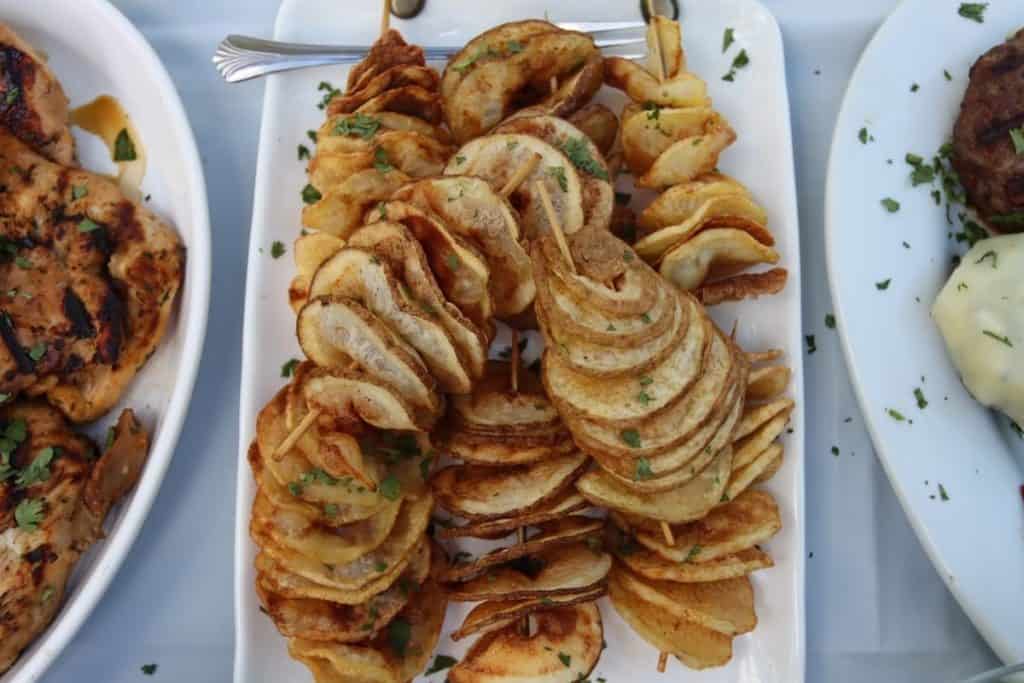
If you are a potato fiend like me, you're obsessed with potatoes. With these, you can cook them crispy-crunchy like potato chips, or you can fry slightly less and get more of a french fry with a crisp. It's up to you. I did a little of both with mine. This should be the last item prepared so you can serve them hot! One person should be in the kitchen frying these awesome twisty potatoes while the other is manning the grill and plattering up the burgers, chicken and foil corn.
You could go with something like my Fancy French Fries with this and do a garlic, parmesan and butter that you pour over the Twisty Potatoes right before serving. You could do a dusting of salt and serve with ketchup - that's what I did. Another option could be a drizzle sriracha on these and go spicy! I tried that one and loved it because I love Sriracha. Do you have any sour cream and onion powder? That would be yummy too! It's your call - do whatever you like.
Nothing says summer like Foil-Wrapped Corn for your backyard bbq

This one couldn't be any easier. Wrap your corn in foil and throw it on the grill for 15-20 minutes, quarter-turning every few minutes. That's it. I chose to cut my ears of corn in half instead of serving a full ear. Why do we call them "ears" of corn?!?! It's a BBQ so people tend to want to sample a little of everything and may not want to commit to the whole corn. Cutting them in half is the perfect sample size. For me, it's butter, salt and pepper. I don't need anything fancy for my corn. Summer corn speaks for itself and doesn't need too much enhancing in my opinion.
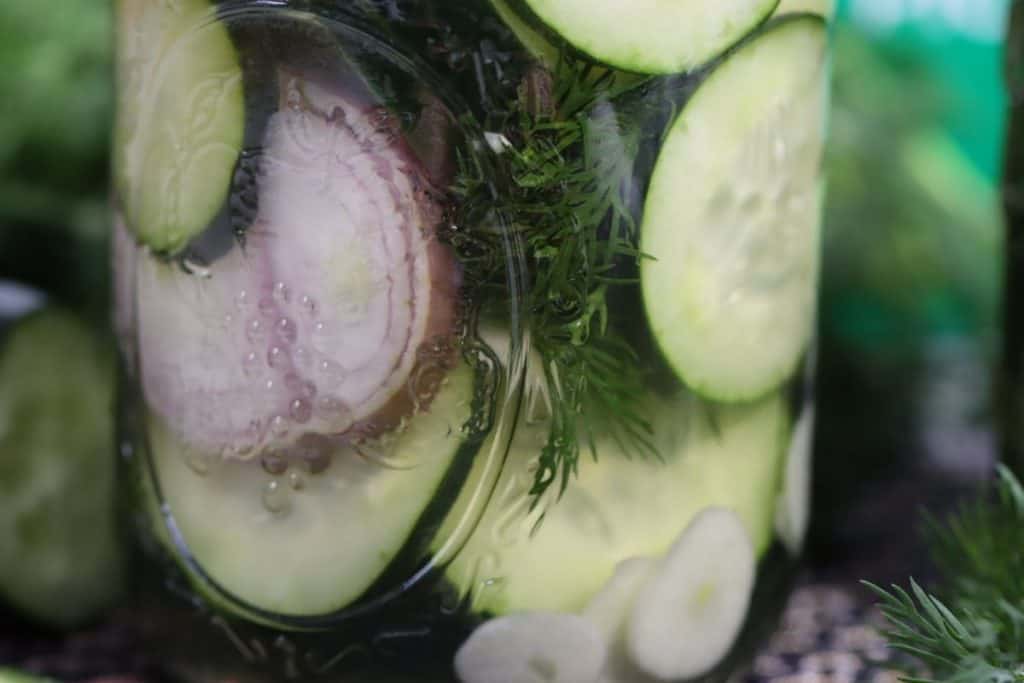
Homemade Garlic Dill Pickles and Bobby Flay's Pickled Red Onions make awesome burger toppings
I recently posted my recipe for Garlic Dill Pickles and I hope you give these a try at some point over the summer. I know it's easy to buy pickles at the store and they are delicious, of course. But there is a certain satisfaction that comes with making your own pickles that can't be duplicated.
And yes, I do buy store-bought pickles too because I can't always keep my homemade pickles stocked. However, when I eat my homemade pickles I smile - that's the kind of happiness I look for in life. If something makes me smile, I tend to do it more often.
The other burger topping, if folks are looking for a different kind of tang, is Bobby Flay's Fantastic Pickled Red Onions. These can be made the day or week before your Backyard BBQ and are just as addicting and versatile as my Garlic Dill Pickles.
Print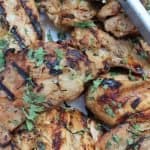
Backyard BBQ: Sriracha-Lime Chicken
- Prep Time: 15 minutes
- Cook Time: 7 minutes
- Total Time: 22 minutes
- Yield: 12 chicken pieces 1x
Description
It’s backyard bbq time and I’ve got you covered with Sriracha-lime chicken, bacon stuffed cheeseburgers and twisty potatoes.
Ingredients
- 3 Boneless chicken breasts (approx. 2 lbs.)
- 6 boneless, skinless chicken thighs (approx. 2 lbs.)
For the marinade: (makes about 2 cups)
- Zest from 2 ½ limes (zest before you start cutting and juicing)
- ½ cup fresh lime juice (5-6 large limes or 10 tiny limes - see note #1)
- ½ cup soy sauce
- ¾ cup of honey
- ¼ cup Sriracha sauce
- 3 tablespoons olive oil
- 1 tablespoon grated ginger (thumb-sized piece)
- 5 cloves whole, peeled garlic
- 1 tablespoon salt
- 1 handful fresh cilantro (approx. 1 cup)
(This marinade could hold 3 pounds of each chicken if you’re making more chicken than listed)
Would you like to save this?
You'll also be the first to hear about new recipes in my weekly-ish newsletter! 🙂
Instructions
- Trim the fat from the boneless chicken breasts and chicken thighs.
- Cut the chicken breasts in half to make more bbq-friendly portion size. Leave the chicken thighs as is.
- Put all the chicken in a large glass bowl.
- Start the marinade. Peel the skin off a chunk of ginger and run it over your microplane to grate it. If you don’t have a microplane, carefully use the smallest grate of a box grater or slice it and mince it yourself with a knife.
- Using a microplane, zest 2 ½ limes and set zest aside. Same as above if you don’t have a microplane – use a box grater.
- Next, cut your limes in half and juice them. I used a hand-held juicer for this and the whole process takes just two minutes if you work quickly.
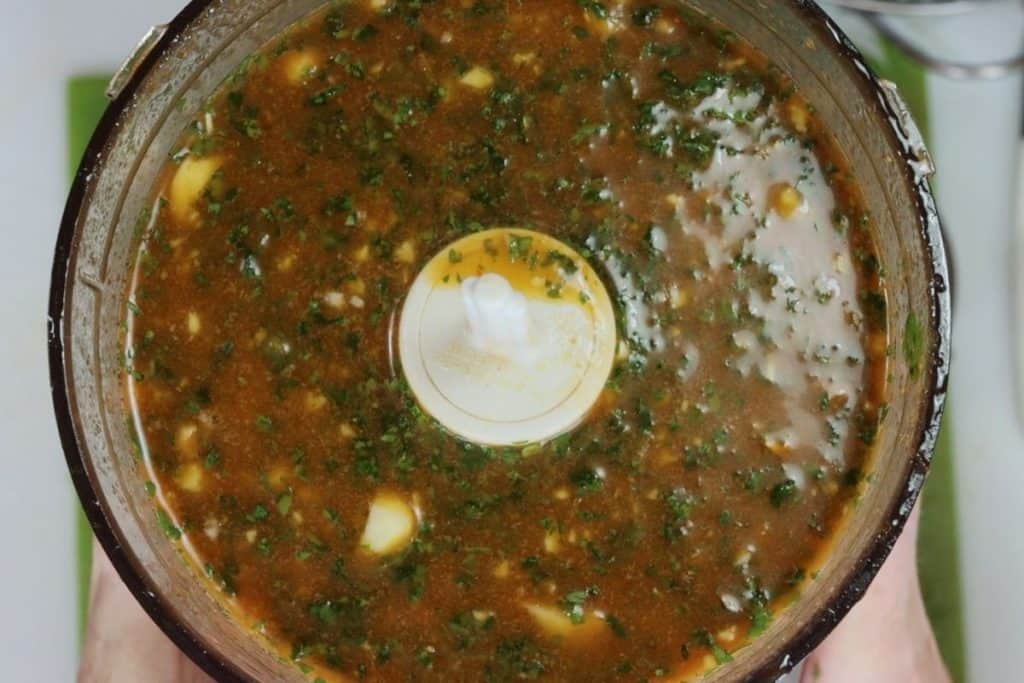
- Pour the fresh lime juice in your mini food processor, blender or ninja nutri-blender if that’s what you have. Add the soy sauce, honey, Sriracha, olive oil, lime zest, grated ginger, garlic cloves, salt, fresh cilantro. Blend until everything is well combined. Reserve some to drizzle on the chicken if you want. (See note #2)
- Pour the marinade into the chicken bowl and work the marinade through all the pieces of chicken to be sure it’s fully coated. Cover the chicken with a fitted lid or plastic wrap. Marinate from 3 hours to overnight. I found that 7 hours is the perfect amount of time. I make my marinade the morning of my bbq and it's ready for the afternoon. If you'd like, set a little marinade aside to brush over the top when the chicken comes off the grill.
- Heat outdoor grill on medium-to-high flame. Cook for 4 minutes on one side (covered/lid down) then turn and cook 3 more minutes on the other side (covered/lid down) or until internal temperature of chicken is 165 degrees.
Notes
- They were out of “loose” limes when I went shopping so I had to buy a bag of limes which I’ve never done before. They were the smallest limes I’ve even seen so it took 10 limes to get the juice I needed. If you’re using medium-to-large limes it should take about 6 limes. Always give yourself a buffer with lemons and limes. Some will be duds with little or no juice to them.
- If you want to reserve some of the marinade you can remove ½ cup or so and still have enough for marinating the chicken. You can brush it on the chicken when it comes off the grill if you want. I make salads with this chicken too so I'll save some to spoon over salad as a dressing.

Backyard BBQ: Bacon-Stuffed Cheeseburgers
- Prep Time: 20 minutes
- Cook Time: 7 minutes
- Total Time: 27 minutes
- Yield: 9 burgers 1x
Description
It’s backyard bbq time and I’ve got you covered with Sriracha-lime chicken, bacon stuffed cheeseburgers and twisty potatoes.
Ingredients
- 3 ¼ lbs of 80/20 ground beef
- 1 cup of bacon bits (9-10 slices of cooked bacon chopped down - see note#1)
- ⅓ cup grated onion, drained
- ¾ teaspoon salt
- ¾ teaspoon black pepper
- 1 tablespoon Dijon mustard
- 1 tablespoon Worcestershire sauce
- 6-9 slices of cheese (any kind you want, I used American and cheddar)
Additional toppings:
- Slices of cooked bacon
- Homemade garlic dill pickles
- Bobby Flay’s pickled red onions
- Ketchup
- Mustard
- Mayo
Would you like to save this?
You'll also be the first to hear about new recipes in my weekly-ish newsletter! 🙂
Instructions
- Cook all the bacon at the beginning of the process since it needs to cool down before you can chop it into bacon bits. Also, set aside the extra slices of bacon that you are not chopping to use as an additional topping for the burgers. I think I cooked a total of 2 pounds of bacon.
- Grate the onion using a box grater or similar. Using a small piece of cheesecloth wrap the grated onion and squeeze the water out while holding over a bowl or the sink. If you don’t have cheese cloth, try a mesh strainer. The water must be drained or your burgers will be weird.
- Once the bacon is cooled down, chop it into small bacon bits. My video shows this well.
- Place your ground beef into a large mixing bowl. Add salt, pepper, Dijon mustard, Worcestershire sauce, grated onion, and all the chopped bacon bits.
- Using your hands (I wore gloves) mix all the ingredients together until it’s well combined. Be sure to flip the meat and work all the ingredients throughout the beef so it’s evenly distributed.
- Form equally sized burger patties so they cook evenly. I had a scale to the side and weighed each one. They were all about 5-6 ounces, but closer to 6. And for thickness they were about 1 inch thick.
- Cook on medium-to-high heat for 4 minutes on one side of your outdoor grill (covered/lid down) then flip over and cook 2 ½-3 minutes on the other side (covered/lid down) for medium-rare. Longer if you want less pink in the middle.
Notes
- You will need about 9-10 slices of bacon to equal one cup of bacon bits. I cooked extra slices to put on the table when serving. If you make the bacon the day before just microwave the extra slices to reheat. Works great. Just 15 seconds at a time until they’re ready. Don’t use flavored bacon for this like maple as it will change the flavor profile.

Backyard BBQ: Foil Wrapped Corn on the Grill
- Prep Time: 10 minutes
- Cook Time: 20 minutes
- Total Time: 30 minutes
- Yield: 10 portions 1x
Description
It’s backyard bbq time and I’ve got you covered with Sriracha-lime chicken, bacon stuffed cheeseburgers and twisty potatoes.
Ingredients
- 5 ears of fresh corn, peeled
- Melted butter for serving
- Salt and pepper to taste
NOTE: You will need aluminum foil for this recipe
Would you like to save this?
You'll also be the first to hear about new recipes in my weekly-ish newsletter! 🙂
Instructions
- Peel all the ears of corn.
- Cut each ear in half to make bbq-friendly portion sizes.
- Rip 10 small sheets of aluminum foil and stack them on top of each other.
- Take each ½ ear of corn, lay it on the foil, roll it up and fold the ends in. Do this for all the corn. My video shows this well.
- Put grill flames on medium flame and cook for 15-20 minutes (covered/lid down) and quarter-turn the corn every few minutes until it’s done.
- Your choice if you want to leave them wrapped in foil or unwrap and serve in a bowl with melted butter, salt and pepper on the side.

Backyard BBQ: Twisty Potatoes
- Prep Time: 10 minutes
- Cook Time: 10 minutes
- Total Time: 20 minutes
- Yield: 8-10 portions 1x
Description
It’s backyard bbq time and I’ve got you covered with Sriracha-lime chicken, bacon stuffed cheeseburgers and twisty potatoes.
Ingredients
- 5-6 small-to-medium potatoes (Russet or Yukon is fine)
- 5 cups peanut oil for frying (depends on size of pot)
- Salt and pepper
Topping ideas:
- Garlic, parmesan butter
- Sriracha
- Ketchup
- Onion powder
- Paprika
- Your favorite spices
TOOLS NEEDED:
1. Potato twisty machine OR skewer potatoes yourself and cut around the potato in a spiral shape then pull apart. (See note#1)
2. Wooden skewers.
NOTE:TIMING ABOVE DOES NOT INCLUDE SOAKING THE POTATOES IN WATER FOR AN HOUR.
Would you like to save this?
You'll also be the first to hear about new recipes in my weekly-ish newsletter! 🙂
Instructions
- If you do not have the potato machine, please see note #1 below.
- It’s your choice if you want the skin on your potatoes. I did some with skin on and some peeled.
- If using the machine, follow the instructions. I stuck the metal skewer through the left or blade end of the machine, then through the potato.
- Adjust the potato gripper on the right side of the machine so that it holds the right end of the potato steady.
- Turn the crank on the right side of the machine to push the potato through the left or blade end and create a spiral potato.
- Pull the potato off the metal skewer and stick a wooden skewer through the middle of the potato.
- Since I made these for a bbq, I wanted smaller portions, so I cut the potato in half or in thirds depending on the size of the potato and made mini twisty potatoes. I also cut my wooden skewers in half to match. (SEE VIDEO)
- Have a large bowl of water on hand and as you skewer the potatoes, place them in the water so they don’t turn brown. Also, you should soak them for one hour to get some of that starch out of them so they will be crispier when they fry.
- When it’s time, heat your peanut oil in a pot to 350 degrees. Fry the potatoes 3-4 at a time, depending on the size of your pot. Mine were done at around 8-10 minutes.
- Transfer to a paper towel-lined sheet pan to collect some of the oil. Salt immediately. Transfer to a platter and serve right away.
Notes
- These are super fun to make if you get a decent potato twisty machine. However, though the machine I used worked enough that I could make them for this video, I simply cannot recommend that machine and give you the link to that product. I had problems with it too and don’t feel good about telling anyone to buy it.
- WHAT I CAN RECOMMEND: I didn’t have time to make another video tutorial of making these with a knife, but I found someone else on YouTube who did. If you want to make these, I found this video where it shows you how to do it by hand with a knife and it's super easy: https://www.youtube.com/watch?v=4XQ8-zGjfz4


Leave a Comment