

I eat a lot of chicken. Like, a lot a lot. For me, it's by far the most versatile protein to begin with, then you've got the choice of either going with dark meat or white meat. I'm partial to the dark meat - can't get enough of it. These pan charred chicken thighs are incredibly easy to make and you can use them so many ways: chicken sandwich (my favorite), rice bowl or salad are three of many directions you could go in.
with chicken thighs: Trim that fat!
I always hear people say they don't want to eat chicken thighs because of all the fat. Well, then don't! It's not rocket science - just trim the fat from the chicken thighs. If you've never done this, you should definitely watch my tutorial so you enjoy your chicken thighs guilt free. I trim bone-in, skin-on chicken thighs in the video, but the same process applies with boneless chicken thighs. You need only a good pair of kitchen shears and a few extra minutes at the beginning of your cooking process.
Pan charred chicken thighs: skillet or teflon?
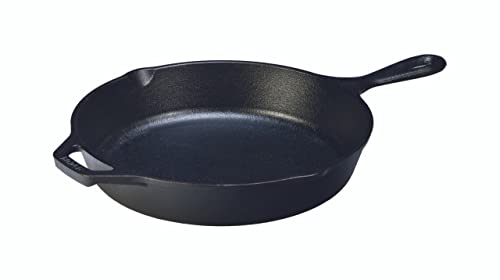
Good news for non-skillet owners: you can use a cast iron skillet OR Teflon pan to make these chicken thighs. I have two skillets so I used those, and truth be told, you will get a better char using a skillet. However, you can still get a very respectable char using Teflon as well.
One tip you should keep in mind if you're using the Teflon is to give the thighs an extra minute or two on the first side before turning them.

marinate with simple ground spice RUB
Marinating chicken is such a great way to go for the best flavor. I got this idea from a local eatery near where I live. They serve ah-mazing rice bowls with all kinds of options for sides. I always get their chicken thighs and the flavor is so incredible! So I asked the chef what they use to marinate and it's a very easy dry rub that consists of: granulated garlic, onion powder, cumin, coriander and salt. Marinate that overnight and you will not believe the flavor. And I absolutely looooovvve the crust that using a rub creates when you sear it like this.
Would you like to save this?
You'll also be the first to hear about new recipes in my weekly-ish newsletter! 🙂

Pan charred chicken thighs three ways
Make a platter of awesome chicken and use it during the week to make easy meals. This seriously can't be any easier. Here are three ways you can use this chicken:
- Chicken sandwich: I cooked some bacon, tossed arugula lettuce in a little olive oil and balsamic vinegar, sliced some tomatoes and toasted a brioche roll. This chicken sandwich is insanely delicious. And if you have time, you can always make homemade garlic dill pickles to serve on the side.
- Salad: Use your favorite fixings here and place the warm sliced chicken on top. I used arugula, thin-sliced onion, and halved cherry tomatoes. I didn't have time to make my favorite balsamic vinaigrette, so I just drizzled a little olive oil and balsamic vinegar on my greens.
- Rice bowl: The options are endless here. I roasted some brussels sprouts and carrots and served the chicken and veggies over basmati rice.


easy steps to make pan charred chicken thighs


Pan Charred Chicken Thighs Three Ways
- Prep Time: 15 minutes
- Cook Time: 8 minutes
- Total Time: 23 minutes
- Yield: 10 chicken thighs 1x
Description
Make a platter of these pan charred chicken thighs and use them for quick easy meals like rice bowls, salads and chicken sandwiches.
Ingredients
- 10 boneless, skinless chicken thighs (3.25 pounds)
- 2 ½ tablespoons granulated garlic
- 1 ½ tablespoons onion powder
- 1 teaspoon cumin
- 1 teaspoon coriander
- 1 ¼ teaspoons salt
- Neutral oil (vegetable or canola)
NOTE: Prep and cook time does not include the overnight marinade
Would you like to save this?
You'll also be the first to hear about new recipes in my weekly-ish newsletter! 🙂
Instructions
- Trim the fat from the chicken thighs. I usually start with any obvious flaps of fat around the edges and then trim out the fat underneath as well. If you have time, watching my how to trim the fat from chicken thighs tutorial could be very helpful for you. When finished trimming, set chicken aside on a plate, sheet pan or large bowl.
- Make the rub. Add the granulated garlic, onion powder, ground cumin, ground coriander and salt to a medium bowl and whisk together.
- Put half the chicken thighs in a large bowl and sprinkle some of the dry rub. Add remaining chicken thighs to bowl and then rest of the dry rub over all the chicken. Drizzle a little neutral oil over everything (maybe a couple of teaspoons here). Now toss and mix the chicken so the rub is covering all the pieces. Massage the chicken and turn pieces over to make sure all the chicken in coated. Put in the refrigerator overnight. You can keep in the same bowl and cover with plastic wrap or transfer chicken to a slider bag.
- Take the chicken out of the fridge and let sit on counter for 20-30 minutes before cooking.
- Heat your pans on medium-to-high heat (two large Teflon pans or cast iron skillets – you will get a better char with a skillet). I like to heat the skillets on their own first for a minute two, then add oil and let it get real hot. You need a high smoke point oil for this like vegetable or canola. Olive oil will not work for this. If you're using Teflon pans, give the chicken an extra minute on the first side to get that char.
- Add the chicken thighs to the pans and don’t touch them. Let them cook for 4-5 minutes. You will start to see the edges crisping up and the chicken should be charred. The rub is going to give us a nice crust on the chicken too. You can lift a piece to see how the char looks. It you want it a little more charred, leave it another minute.
- After the 4-5 minute mark, turn the chicken thighs and cook another 3-4 minutes on the other side.
- Remove from pan and place on a paper towel lined plate or sheet pan to absorb some of that oil. Then transfer to a serving plate.
- You can use this chicken for anything you want now. I made rice bowls, salads and sandwiches. See photos and descriptions in blog post.


Leave a Comment